前回まででユーザー情報の作成・変更処理が一通り実装できたので、最後にユーザー情報をする処理を実装していきます。
ユーザー削除処理の実装
ユーザー情報削除ページの作成
pagesディレクトリにdelete.vueという名前でファイルを作り、適当にユーザー情報削除用のフォームを作ります。こんな感じに作ってみました。 削除ボタンがひとつあり、api/userにdeleteメソッドを投げるだけです。
|
1 2 3 4 5 6 7 8 9 10 11 12 13 14 15 16 17 |
<template> <form @submit.prevent="deleteAccount"> <v-btn type="submit">削除</v-btn> </form> </template> <script> export default { methods: { async deleteAccount() { try { await this.$axios.delete("api/user"); } catch (e) {} }, }, }; </script> |
見た目はこんな感じになります。

ユーザー情報削除ルートの作成
routes/api.phpファイルを次の様に編集します。26-28行目でuserを削除するルートを追加し、'password.confirm'のミドルウェアを指定しています。ボタンクリックだけでユーザーアカウントの削除を実行してしまうのは危険なのでパスワードの確認をさせることにしました。
|
1 2 3 4 5 6 7 8 9 10 11 12 13 14 15 16 17 18 19 20 21 22 23 24 25 26 27 28 29 |
<?php use Illuminate\Http\Request; use Illuminate\Support\Facades\Route; /* |-------------------------------------------------------------------------- | API Routes |-------------------------------------------------------------------------- | | Here is where you can register API routes for your application. These | routes are loaded by the RouteServiceProvider within a group which | is assigned the "api" middleware group. Enjoy building your API! | */ // Route::middleware(['auth:sanctum'])->get('/user', function (Request $request) { // return $request->user(); // }); Route::middleware(['auth:sanctum', 'verified'])->group(function () { Route::get('/user', function (Request $request) { return $request->user(); })->withoutMiddleware(['verified']); Route::delete('/user', function (Request $request) { return $request->user()->delete(); })->middleware('password.confirm'); }); |
テスト実行
このままdelete.vueの画面で削除ボタンを実行するとdeleteメソッドの応答で"Password confirmation required."と返ってくるので、期待通りにpassword.confirmのミドルウェアが設定されていることが確認できました。

パスワード確認処理の実装
それではパスワード確認のために必要な処理を実装していきます。
パスワードの確認ページの作成
pagesディレクトリにconfirm-password.vueという名前でファイルを作り、適当にパスワード確認用のフォームを作ります。こんな感じに作ってみました。パスワードの入力欄がひとつあり、Fortifyが用意してくれているuser/confirm-passwordにpostメソッドを投げるだけです。その後、delete.vueに移動させています。
|
1 2 3 4 5 6 7 8 9 10 11 12 13 14 15 16 17 18 19 20 21 22 23 24 25 26 27 28 29 |
<template> <form @submit.prevent="confirmPassword"> <v-text-field type="password" name="password" id="password" v-model="form.password" /> <v-btn type="submit">確認</v-btn> </form> </template> <script> export default { auth: false, data() { return { form: { password: "", }, }; }, methods: { async confirmPassword() { try { await this.$axios.get("sanctum/csrf-cookie"); await this.$axios.post("user/confirm-password", this.form); this.$router.replace("delete"); } catch (e) {} }, }, }; </script> |
見た目はこんな感じになります。

ユーザー情報削除ページの修正
12行目で、api/userページに削除リクエストを投げ、16-18行目で423が返ってきたらconfirm-passwordページに遷移するようにします。
|
1 2 3 4 5 6 7 8 9 10 11 12 13 14 15 16 17 18 19 20 21 22 23 |
<template> <form @submit.prevent="deleteAccount"> <v-btn type="submit">削除</v-btn> </form> </template> <script> export default { methods: { async deleteAccount() { try { await this.$axios.delete("api/user"); this.$auth.logout(); this.$router.replace("login"); } catch (e) { if (e.response.status === 423) { this.$router.replace("confirm-password"); } } }, }, }; </script> |
cors対策
config\cors.phpのpathsに'user/confirm-password'を追加します。

実行
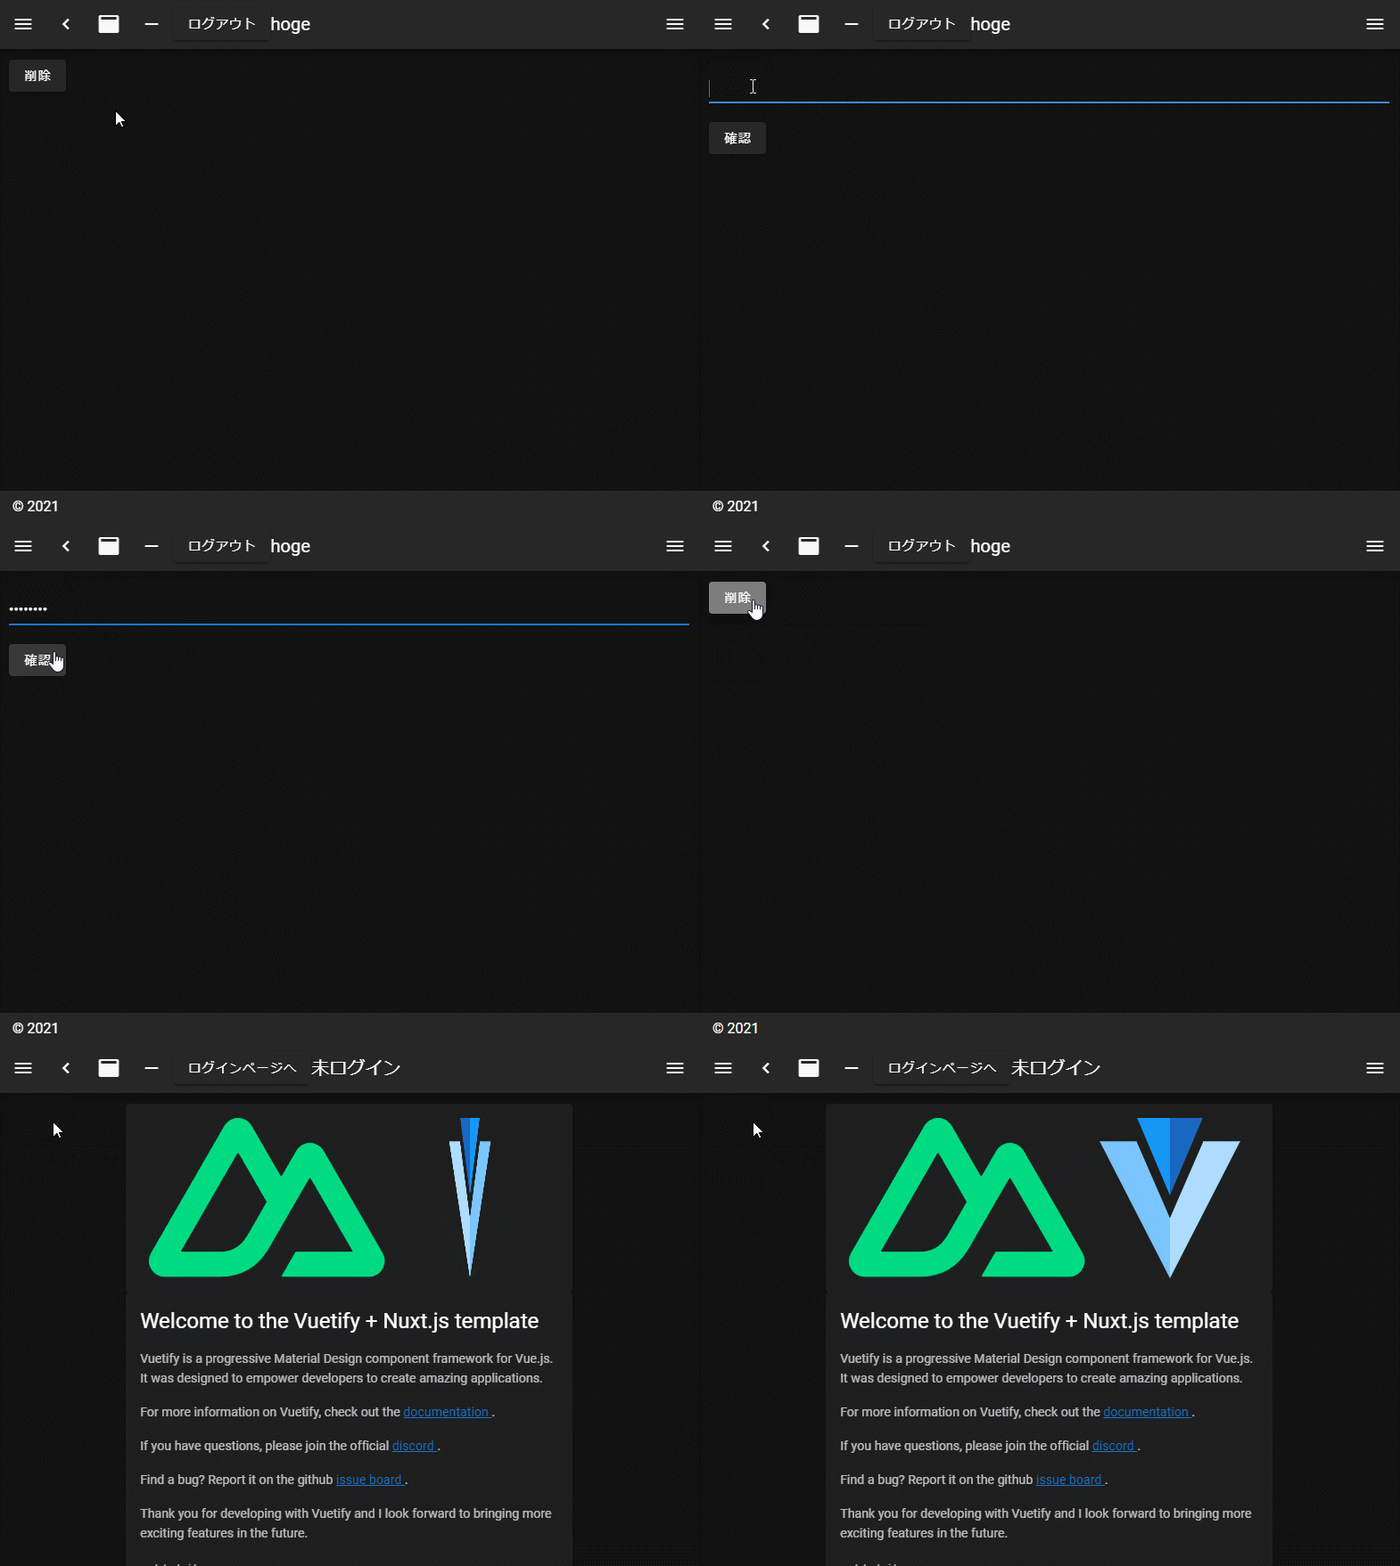
これで実装できましたので実行してみます。以下の様な動作になります。

最後に
これでユーザーの認証に関する一通りの処理が実装できました。Laravel+Sanctum+FortifyとNuxt.js+nuxt/authの構成をとることで、自前で書かなければならない処理がかなり減らせることが確認できたと思います。
後は自分の好きなようにWebアプリケーションを実行するだけです。誰かのお役に立てたら幸いです。

