WindowsでComposerをインストールする手順です。PHPがインストール済みであることが前提です。
↓ここ変える!
![](https://i0.wp.com/hitoriit.blog/wp-content/uploads/2021/07/laravel.png?resize=160%2C160&ssl=1)
インストーラのダウンロード
以下のアドレスにアクセスしてComposer-Setup.exeをダウンロードします。現時点の最新バージョンは2.1.6でした。
参考 ComposerComposer![](https://hitoriit.blog/wp-content/uploads/2021/09/image-13-1024x788.png)
インストーラの実行
ダウンロードしたインストーラをダブルクリックして実行すると以下画面が表示されますので「Install for users (recommended)」を選択します。
![](https://hitoriit.blog/wp-content/uploads/2021/09/image-14.png)
そのままNextを選択
![](https://hitoriit.blog/wp-content/uploads/2021/09/image-15.png)
そのままNextを選択
![](https://hitoriit.blog/wp-content/uploads/2021/09/image-16.png)
私の場合php.iniを作成していなかったのですが、無い場合は勝手に作ってくれるようなのでそのままNextを選択
![](https://hitoriit.blog/wp-content/uploads/2021/09/image-17.png)
会社などでインターネットに接続する際にプロキシサーバーを使用している場合はプロキシサーバーを入力してNextを選択。指定する場合は「http://127.0.0.1:8080」の様な形式で入力。
![](https://hitoriit.blog/wp-content/uploads/2021/09/image-18.png)
確認画面が表示されるのでInstallを選択
![](https://hitoriit.blog/wp-content/uploads/2021/09/image-19.png)
そのままNextを選択
![](https://hitoriit.blog/wp-content/uploads/2021/09/image-20.png)
そのままFinishを選択
![](https://hitoriit.blog/wp-content/uploads/2021/09/image-21.png)
確認
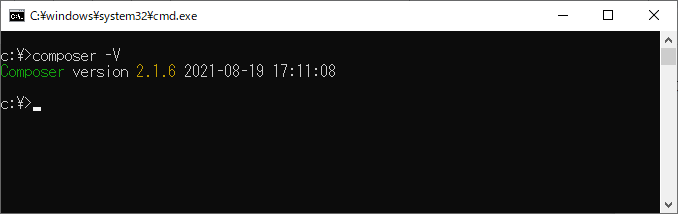
新しくコマンドプロンプトを開いて「composer -V」と入力し、以下のような結果になればOKです。
![](https://hitoriit.blog/wp-content/uploads/2021/09/image-22.png)